


Few things disrupt your day faster than the dreaded click-click-click of a dead car battery. Whether you are stranded in a cold grocery store parking lot or rushing to a morning meeting, a dead battery can feel like an absolute disaster. However, learning how to safely jump start a car is a fundamental driving skill that saves you time, money, and stress.
This comprehensive guide will teach you exactly how to revive your vehicle using jumper cables or a portable jump box. Additionally, we will cover essential safety precautions, common mistakes to avoid, and diagnostic tips to ensure you are never left stranded again.
Safety First: Essential Rules Before You Begin
Before you even touch a pair of jumper cables, you must prioritize safety. Car batteries store a massive amount of electrical energy and contain volatile, sulfuric acid. Therefore, reckless handling can result in electrical shocks, short circuits, or even dangerous battery explosions.
Inspect the Dead Battery for Damage
First, pop the hood and look closely at the dead battery. If you notice cracks in the plastic casing, leaking fluid, or a strange bulging shape, do not attempt to jump start the car. A bulging or leaking battery indicates internal structural failure or freezing. Trying to pass electricity through a damaged battery can trigger an immediate explosion. Consequently, you must call a tow truck or replace the battery entirely.
Clear Away Rust and Corrosion
Next, examine the metal terminals. If a thick, white, green, or blue powdery substance covers the metal posts, you are looking at battery corrosion. This buildup acts as an insulator, which blocks the flow of electricity. Consequently, you should clean the terminals with a stiff wire brush or a specialized battery cleaning tool before attaching your clamps.
Keep the Vehicles Separated
When positioning the booster car (the vehicle with the good battery) next to the stalled car, ensure that the metal bodies of the two vehicles do not touch each other. If the cars touch, they can create an accidental ground loop. This mistake can lead to massive electrical sparks and severe damage to the sensitive electronic control units (ECUs) of both vehicles.
Tools of the Trade: What You Need in Your Trunk
To successfully resolve a dead battery issue, you should always keep a few basic emergency tools in your trunk.
High-Quality Jumper Cables: Look for heavy-duty cables that feature a low gauge number (such as 4-gauge or 2-gauge). Thicker wires allow electricity to flow much more efficiently than flimsy, cheap retail store cables. Furthermore, aim for a length of at least 12 to 16 feet so you can comfortably reach between cars.
Safety Glasses: A simple pair of plastic safety glasses will protect your eyes from accidental sparks or unexpected acid sprays.
Heavy-Duty Work Gloves: Thick leather or rubber-coated gloves shield your hands from dirt, sharp metal edges, and electrical current.
A Portable Jump Box (Optional): If you often travel through remote areas, consider buying a lithium-ion portable jump starter. This handy device allows you to jump start your car completely on your own, without needing a second vehicle.
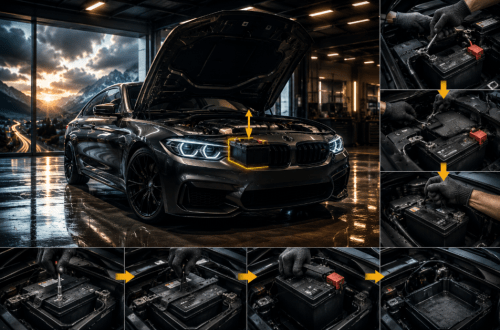
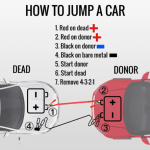
The Step-by-Step Jumper Cable Sequence
If you are using a traditional donor car, the exact sequence of your connections matters immensely. Connecting the clamps in the wrong order can cause blinding sparks, blow vital vehicle fuses, or melt your wires. Therefore, follow this strict protocol carefully to keep yourself and your vehicles perfectly safe.
Step 1: Prep Both Vehicles
First, park the working vehicle close enough to the disabled car so that the cables reach comfortably without stretching. Next, turn off the engines of both cars. Engage the parking brakes firmly on both vehicles, and ensure that both transmissions rest securely in Park (for automatics) or Neutral (for manuals). Finally, turn off all headlights, radio systems, cabin fans, and cell phone chargers to prevent sudden power surges.
Step 5: Start the Engines
First, start the engine of the donor vehicle and let it idle smoothly for roughly three to five minutes. This brief waiting period allows the good alternator to push a baseline charge into the surface of the dead battery. Next, attempt to start the stalled vehicle.
If the engine cranks but refuses to fire up immediately, wait another few minutes to build up more power before trying again. However, if the car starts up successfully, celebrate briefly, but do not turn off the engine!
Step 6: Disconnect the Cables in Reverse
To remove the cables safely without causing sparks, you must follow the exact reverse order of your initial setup.
Disconnect the black (negative) clamp from the unpainted metal ground of the jumped car.
Remove the black (negative) clamp from the donor car’s negative terminal.
Take off the red (positive) clamp from the donor car’s positive post.
Finally, disconnect the red (positive) clamp from the newly revived battery.
How to Jump Start a Car with a Portable Jump Box
Portable lithium-ion jump packs have revolutionized roadside emergencies. Because these devices do not require a second vehicle, they are perfect for tight parking garages or isolated locations.
+-----------------------------------------------------------+
|               PORTABLE JUMP BOX CHECKLIST                 |
+-----------------------------------------------------------+
| [ ] Verify the jump box battery life is above 50-60%.      |
| [ ] Turn off the jump box power switch completely.         |
| [ ] Connect the RED clamp to the positive (+) terminal.    |
| [ ] Connect the BLACK clamp to a solid metal ground point. |
| [ ] Turn on the jump box power or activate "Boost" mode.  |
| [ ] Crank the vehicle's engine.                           |
| [ ] Turn off the jump box and remove clamps in reverse.   |
+-----------------------------------------------------------+
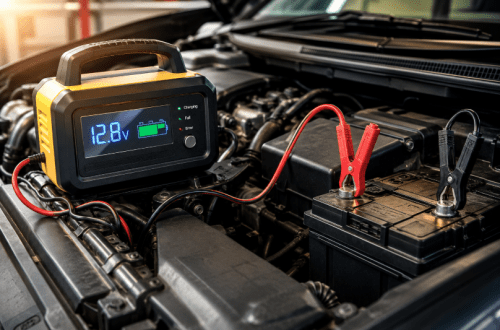
First, ensure that your portable jump box holds a charge of at least 50% to 60%. Next, connect the red clamp to the positive terminal of the dead battery, and connect the black clamp to an unpainted metal ground point on the engine block.
Once your clamps are securely locked in place, turn on the power switch on the jump box. Many modern packs feature a smart detection light; wait until this light glows a solid green. Finally, hop into the driver’s seat and crank the engine. After the vehicle starts, turn off the power switch on the jump box and remove the clamps carefully.
What to Do Immediately After Your Car Starts
Once your engine runs successfully, your job is not quite done. The alternator needs time to recharge your deeply depleted battery. Therefore, you should keep the vehicle running and take it for a 30-minute drive on the highway or main roads.
Avoid sitting in stagnant traffic or idling in your driveway. Higher engine RPMs allow the alternator to generate electricity much more efficiently. Additionally, keep non-essential electrical components like heated seats, air conditioning, and high-beam headlights turned off during this drive to maximize the charging current flowing back into the battery.
Troubleshooting: What if the Car Won’t Start?
Sometimes, a jump start fails to bring a car back to life. If you experience this issue, use the diagnostic guide below to pinpoint the problem.
| What You Observe | Likely Root Cause | Practical Solution |
| Rapid clicking sound, dashboard lights flicker | Poor electrical connection or heavily depleted battery | Wiggle the clamps to ensure they bite through rust, and let the donor car charge the battery for 5 additional minutes. |
| Complete silence, no interior lights turn on | Dead starter motor, blown main fuse, or completely ruined battery | Check your connection point on the engine block. If it is secure, your battery may have suffered a permanent internal short. |
| Engine cranks perfectly but will not catch fire | Fuel system issue or ignition spark failure | The battery is not your problem. Check your fuel gauge, fuel pump relay, or spark plugs. |
| Car starts with a jump but dies immediately when cables come off | A failing or broken alternator | Your alternator can no longer maintain the vehicle’s electrical load. You will need a professional replacement. |
Common Mistakes That Can Destroy Your Vehicle
Modern automobiles are rolling computers filled with sensitive microprocessors. Consequently, making a mistake during a jump start can lead to thousands of dollars in mechanical repair bills.
Never Mix Up Red and Black: Connecting positive to negative causes an immediate short circuit. This severe mistake can melt your jumper wires instantly, destroy your alternator, and brick your car’s main computer.
Do Not Use Water to Wash Off Acid: If you see white corrosion, do not pour water blindly over the battery while it is connected. Water can wash dangerous acid onto sensitive engine sensors below. Instead, use a paste made of baking soda and a tiny bit of water to neutralize the acid safely.
Never Let Clamps Touch Each Other: While the cables are hooked up to one vehicle, never let the dangling clamps on the other end strike each other. This creates a massive electrical arc that can damage your eyes and burn your hands.
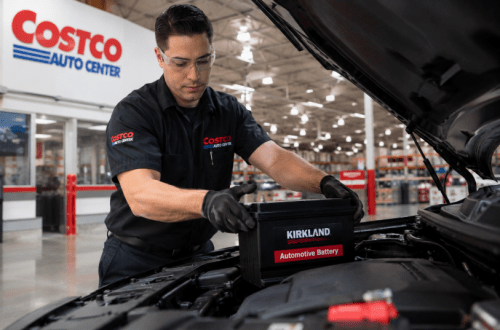
When Is It Time to Buy a New Battery?
On average, a standard lead-acid car battery lasts between three to five years. Extreme summer heat, freezing winter temperatures, and short driving trips can drastically shorten this lifespan.
If your battery is more than four years old and struggles to turn over on chilly mornings, do not wait until you are stranded again. Take your vehicle to a local auto parts store. Most major retailers will gladly attach a professional digital battery load tester to your vehicle completely free of charge. If the test reveals that your battery’s Cold Cranking Amps (CCA) have dropped below healthy levels, invest in a replacement immediately to guarantee your peace of mind.