


The Key Question: How Do You Reset a Check Engine Light?
Few dashboard warnings create as much concern for drivers as the check engine light. Whether it appears suddenly during a commute or after a vehicle repair, many car owners immediately start looking for ways to turn it off. The most common question is simple: How do you reset a check engine light?
The answer depends on why the light came on in the first place. In some cases, the issue may have already been fixed, but the vehicle’s computer has not yet cleared the warning. In other situations, resetting the light without addressing the underlying problem can cause the warning to return quickly.
Understanding how the check engine light works and knowing the correct reset methods can save time, reduce stress, and help prevent unnecessary repair expenses. This guide explains what the check engine light means, why it appears, and the safest ways to reset it.
Understanding the Check Engine Light
Before attempting a reset, it is important to understand why the check engine light exists.
The check engine light is part of a vehicle’s onboard diagnostic system, commonly known as OBD-II. Modern vehicles contain numerous sensors that continuously monitor engine performance, emissions systems, fuel delivery, ignition timing, and other critical functions.
When one of these systems detects an abnormal condition, a diagnostic trouble code (DTC) is stored in the vehicle’s computer. As a result, the check engine light is illuminated on the dashboard.
Common Reasons a Check Engine Light Comes On
Several issues can trigger the warning light, including:
- Loose or damaged gas cap
- Faulty oxygen sensor
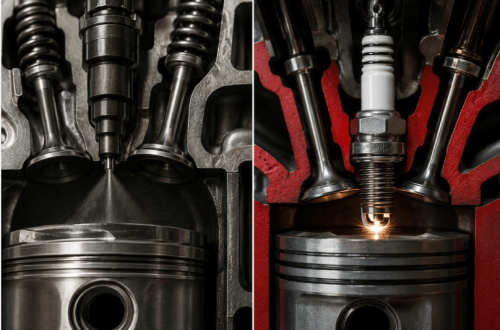
- Bad spark plugs
- Ignition coil problems
- Catalytic converter issues
- Mass airflow sensor failure
- Engine misfires
- Emissions system malfunctions
- Vacuum leaks
- Fuel system problems
Some of these issues are minor, while others require immediate attention.
Solid vs. Flashing Check Engine Light
A solid check engine light usually indicates a non-emergency problem that should be diagnosed soon.
A flashing check engine light often signals a serious issue, such as an engine misfire, that could damage the catalytic converter. If the light is flashing, the vehicle should be inspected as soon as possible.
Why Reseting the Check Engine Light Matters
Many drivers assume that turning off the light solves the problem. However, the check engine light is only a warning indicator. Resetting it without fixing the underlying issue does not repair the vehicle.
There are situations where resetting the light is appropriate:
- A repair has already been completed.
- The issue was temporary.
- A loose gas cap caused the warning.
- Diagnostic testing has confirmed the problem is resolved.
In these cases, resetting the light allows the vehicle’s computer to perform new system checks.
Method 1: Use an OBD-II Scanner
The safest and most effective method is using an OBD-II scanner.
Step 1: Locate the OBD-II Port
The diagnostic port is usually found beneath the dashboard near the steering wheel.
Step 2: Connect the Scanner
Insert the scanner into the port while the vehicle is turned off.
Step 3: Turn the Ignition On
Turn the key to the “On” position without starting the engine if required by the scanner instructions.
Step 4: Read Diagnostic Codes
Allow the scanner to communicate with the vehicle computer.
Record any stored trouble codes before clearing them.
Step 5: Clear the Codes
Select the option labeled:
- Clear Codes
- Erase Codes
- Reset DTCs
The scanner will remove stored trouble codes and turn off the check engine light.
Step 6: Restart the Vehicle
Start the engine and verify whether the warning light remains off.
This method is preferred because it identifies the cause before clearing the warning.
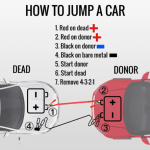
Method 2: Disconnect the Battery
Disconnecting the battery can sometimes reset the vehicle computer.
Step 1: Turn Off the Vehicle
Ensure the engine is completely off.
Step 2: Disconnect the Negative Battery Terminal
Using a wrench, remove the negative cable from the battery.
Step 3: Wait 15 to 30 Minutes
This waiting period allows stored electrical energy to discharge.
Step 4: Reconnect the Battery
Reconnect the negative terminal securely.
Step 5: Start the Engine
Check whether the warning light has disappeared.
Potential Drawbacks
This method may also reset:
- Radio settings
- Clock settings
- Driver preferences
- Stored vehicle data
Because of these disadvantages, many technicians recommend using an OBD-II scanner instead.
Method 3: Drive the Vehicle Normally
In some situations, the vehicle’s computer clears the warning automatically.
If the issue has been repaired successfully, the onboard computer may remove the code after several successful drive cycles.
Typical Drive Cycle Requirements
The vehicle may need:
- Multiple engine starts
- Highway driving
- City driving
- Several days of operation
Depending on the manufacturer, this process can take anywhere from a few trips to several weeks.
This method requires patience but avoids manual resets.
Method 4: Tighten the Gas Cap
A loose gas cap is one of the most common causes of a check engine light.
Why It Happens
The fuel system is sealed to prevent vapor emissions.
If the gas cap is loose, damaged, or missing, the system may detect a leak and trigger the warning light.
How to Fix It
- Turn off the vehicle.
- Remove the gas cap.
- Inspect it for cracks or damage.
- Reinstall it securely until it clicks.
After several driving cycles, the check engine light may disappear automatically.
Mistakes to Avoid When Resetting a Check Engine Light
Many vehicle owners make mistakes that can lead to larger problems later.
Ignoring the Diagnostic Code
Clearing codes without reading them first removes valuable information.
Always identify the cause before performing a reset.
Repeatedly Clearing the Light
If the warning returns immediately after a reset, the underlying issue still exists.
Repeated resets should not replace proper diagnosis.
Ignoring a Flashing Light
A flashing check engine light often indicates severe engine trouble.
Continuing to drive may result in expensive repairs.
Using Low-Quality Scan Tools
Cheap scanners sometimes fail to provide accurate information.
A reliable scanner can improve diagnostic accuracy.
When a Check Engine Light Will Not Reset
Sometimes the warning remains on even after a reset attempt.
Several factors may cause this:
The Problem Still Exists
The vehicle computer continues detecting a fault.
Incomplete Repair
A replacement part may not have solved the root cause.
Multiple Fault Codes
More than one issue may be present.
Faulty Sensor
A defective sensor can continue generating error codes.
Computer System Problems
Although uncommon, the engine control module may experience issues requiring professional diagnosis.
Should You Reset the Check Engine Light Yourself?
In many situations, yes.
If:
- The issue has already been repaired
- A loose gas cap caused the warning
- You have access to a scanner
- You understand the diagnostic codes
Then resetting the light can be a straightforward process.
However, if the cause remains unknown, professional diagnosis is often the safest option.
Modern vehicles contain sophisticated electronic systems that require specialized equipment and expertise.
Benefits of Properly Resetting the Check Engine Light
When performed correctly, resetting the check engine light offers several benefits:
- Confirms successful repairs
- Clears outdated diagnostic codes
- Helps monitor new issues
- Improves confidence in vehicle performance
- Reduces unnecessary dashboard warnings
Most importantly, it ensures the onboard diagnostic system can continue monitoring the vehicle accurately.
Conclusion
Knowing how to reset a check engine light is an important skill for any vehicle owner. However, the warning should never be ignored or treated as a simple inconvenience. The check engine light serves as an early warning system that alerts drivers to potential problems affecting performance, emissions, and reliability.
The best approach is to identify and repair the underlying issue before attempting a reset. Using an OBD-II scanner remains the safest and most reliable method because it allows drivers to read and clear diagnostic codes accurately. Alternative methods, such as disconnecting the battery or waiting for the system to clear itself, can also work in certain situations.
By understanding what triggers the check engine light and following the correct reset procedures, drivers can maintain their vehicles more effectively, avoid unnecessary repairs, and keep their cars operating safely and efficiently.
FAQs
1. Can I reset the check engine light without a scanner?
Yes. Disconnecting the battery or allowing the vehicle to complete several drive cycles may reset the light. However, using a scanner is generally the most reliable method.
2. Will disconnecting the battery permanently remove the check engine light?
No. If the underlying problem still exists, the light will usually return after the vehicle’s computer performs new system checks.
3. How long does it take for the check engine light to reset itself?
Depending on the vehicle and the issue, it may take several drive cycles, ranging from a few days to a few weeks.
4. Is it safe to drive with the check engine light on?
A solid light often allows continued driving for a short period, but diagnosis should not be delayed. A flashing light requires immediate attention.
5. Can a loose gas cap trigger the check engine light?
Yes. A loose, damaged, or missing gas cap is one of the most common reasons the warning light appears.
6. Why does the check engine light come back after resetting?
The warning usually returns because the original problem has not been fixed or another fault has been detected.
7. Does resetting the check engine light fix the problem?
No. Resetting only removes the warning and stored codes. The underlying mechanical or electrical issue must still be repaired.