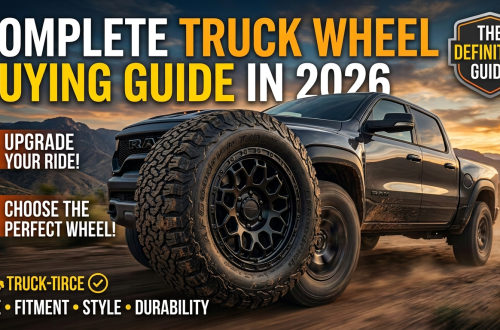









Upgrading your truck with a custom suspension lift kit is one of the most satisfying transformations an automotive enthusiast can undertake. Furthermore, installing a lift kit completely alters your vehicle’s physical stance, substantially increases ground clearance, and accommodates massive off-road tires easily. However, many truck owners assume that this dramatic mechanical modification requires handing thousands of dollars over to a professional custom shop. Consequently, they miss out on the incredible sense of personal accomplishment that comes from executing a major suspension build independently.
Fortunately, learning how to lift a truck yourself is an entirely achievable weekend project if you possess solid mechanical patience. By utilizing the correct safety equipment, acquiring specialized hand tools, and executing the technical assembly systematically, you can achieve professional-grade results. Therefore, this comprehensive operational guide will walk you through the essential tools, safety protocols, and physical steps required to lift your truck flawlessly.
Body Lifts vs. Suspension Lifts: Choosing Your Custom Architecture
Before turning a single wrench, you must select the specific type of modification that best serves your driving lifestyle. A standard body lift kit utilizes heavy-duty nylon spacers to elevate your truck’s body panels away from the underlying steel frame. Because this configuration does not alter your factory suspension components, it represents a highly affordable way to clear larger wheel packages. However, body lifts do not increase your actual ground clearance under the differential, making them ideal primarily for highway styling.
Conversely, a true suspension lift kit replaces your factory shocks, leaf springs, control arms, and front struts entirely with extended components. This engineering methodology physically pushes the entire chassis upward, significantly improving your off-road approach, breakover, and departure angles on rough trails. Therefore, while a suspension system demands a more complex installation process, it delivers massive functional performance gains that body blocks cannot match.
Phase 1: Pre-Staging Your Heavy-Duty Tool Arsenal
Lifting a massive multi-ton pickup truck requires specialized garage equipment that goes far beyond a basic roadside emergency toolkit. Because you will be wrestling with stubborn factory bolts tightened to extreme torque values, having the right leverage is absolutely paramount.
Professional Shop Gear Checklist
Heavy-Duty Floor Jack: Select a high-lift hydraulic jack rated for a minimum capacity of three tons.
Tall Jack Stands: Secure at least four premium jack stands capable of supporting your truck’s specific gross vehicle weight safely.
Calibrated Torque Wrench: Essential for tightening critical suspension fastners to exact manufacturer specifications.
Breaker Bar and Deep Impact Sockets: Crucial for breaking loose factory suspension hardware coated in stubborn road grime.
Penetrating Oil (WD-40 or PB Blaster): Essential for dissolving chemical rust on underbody components before removal.
Specialty Tools: Keep a dedicated ball joint separator and heavy-duty spring compressors readily available for strut disassembly.
Phase 2: Preparing a Safe, Level Work Environment
Working beneath a raised vehicle demands absolute adherence to strict safety rules because a shifting chassis can cause catastrophic injuries. Always park your vehicle on a perfectly flat, poured concrete garage floor rather than an uneven asphalt or gravel driveway. Next, engage the emergency parking brake firmly, place the transmission securely into park, and place heavy wheel chocks behind the rear tires.
Crucial Electrical Safety: Before touching any mechanical component under the vehicle, always disconnect the negative battery cable from the terminal. This simple precaution prevents you from accidentally shorting out your truck’s main electrical wiring harness while working near the starter motor or steering column.
Once the electrical system is safe, use a heavy lug wrench to loosen the wheel lug nuts slightly before raising the vehicle. Next, position your hydraulic floor jack under the designated factory frame lift points and carefully raise the front axle off the ground. Slide your heavy-duty jack stands under the solid frame rails, lower the jack slowly until the truck rests securely, and shake the vehicle vigorously to verify total structural stability.
Phase 3: Removing the Front Factory Suspension Assembly
With the front wheels completely removed and set aside, you can begin the physical teardown of the factory front suspension components. Start by soaking the upper control arm bolts, sway bar end links, and tie rod ends generously with high-grade penetrating oil.
+-----------------------------------------------------------+
|          FRONT DISASSEMBLY SEQUENTIAL WORKFLOW            |
+-----------------------------------------------------------+
| [1] Disconnect ABS sensor lines & flexible brake brackets |
| [2] Unbolt the front sway bar end links from the control arm|
| [3] Separate the upper ball joint using a fork or separator|
| [4] Remove factory shock absorber or strut tower assembly  |
+-----------------------------------------------------------+
As detailed in the breakdown above, you must protect your delicate electronic anti-lock braking system (ABS) lines from tearing during disassembly. Unclip these wires carefully and hang the heavy brake calipers from the frame using thick mechanic’s wire rather than letting them dangle by their rubber hoses. Next, remove the lower strut mounting bolts and unbolt the upper strut tower nuts inside the engine bay to lift the heavy factory assembly completely out of the wheel well.
Phase 4: Installing the New Front Lift System Components
The precise installation process will vary depending on whether your custom lift kit features extended replacement struts or basic strut spacers. If your kit utilizes top-hat spacers, bolt the machined aluminum or polyurethane blocks directly onto the top of your factory strut tower assembly. Next, guide the newly extended strut back up into the engine bay mounting holes and loosely tighten the upper nuts to hold it in place.
Use your floor jack carefully to lift the lower control arm upward, alignment holes together, and slide the heavy lower mounting bolts through. Next, reconnect the steering knuckle to the new, corrected-angle upper control arm that was included in your comprehensive lift package. These aftermarket control arms are absolutely vital because they correct your ball joint angles, preventing premature wear and maintaining proper steering alignment geometry.
Phase 5: Upgrading the Rear Suspension Infrastructure
Once the front assembly is entirely bolted together, move your chocks, floor jack, and jack stands to the rear axle to repeat the lifting process. Most modern pickup trucks utilize a traditional leaf spring rear suspension setup, which makes the rear lift process significantly more straightforward than the front independent suspension. Start by supporting the heavy rear differential housing with your hydraulic floor jack to keep the axle from dropping unexpectedly when unbolted.
                  TYPICAL REAR BLOCK INSTALLATION

        [ Truck Frame Rail ]      <--- Supported by Jack Stands
                 ||
        [ Leaf Spring Pack ]
        [ New Lift Block  ]       <--- Inserts between Springs & Axle
     =========================
        [ Rear Axle Tube   ]
                 ||
        [ Hydraulic Jack   ]      <--- Supports & Lowers the Axle
Carefully remove the elongated factory U-bolts that secure the leaf spring pack directly to the steel rear axle seat. Lower your floor jack slowly just a few inches to create a small gap between the leaf springs and the axle housing. Next, slide the new, taller mechanical lift blocks directly into the center pin alignment holes on the axle pad, ensuring the tapered end faces forward to maintain proper driveshaft pinion angles.
Phase 6: Torquing Fasteners and Executing Critical Final Checks
With your new extended U-bolts installed around the leaf springs, use your torque wrench to tighten all nuts systematically in a crisscross pattern. Never rely on a standard impact gun for this step because inaccurate torque can lead to loose suspension hardware or snapped bolts on the highway. Refer closely to your lift kit’s specific assembly manual to verify every single factory torque rating before lowering the vehicle.
| Suspension Component | Average Torque Specification | Thread Locker Application |
| Strut Tower Upper Nuts | 45 to 55 ft-lbs | Not Required |
| Lower Control Arm Bolts | 110 to 135 ft-lbs | Recommended (Blue) |
| Rear Leaf Spring U-Bolts | 90 to 110 ft-lbs | Highly Recommended |
| Wheel Lug Nuts | 100 to 140 ft-lbs | Strictly Forbidden |
After torquing every bolt to specification, reinstall your wheels, tighten the lug nuts hand-tight, and carefully lower the truck back down to the ground. With the full weight of the vehicle resting naturally on its tires, bounce on the bumpers to settle the suspension before executing your final torque check on the lower control arm bushings.
Post-Installation Crucial Steps: Alignment and Re-Torque Maintenance
Immediately after completing a DIY lift kit installation, your truck’s wheel alignment geometry will be completely out of factory specifications. Driving a lifted truck without a professional wheel alignment will cause severe tire scrubbing, rapid tread wear, and dangerous steering handling characteristics. Therefore, you must schedule a professional computer alignment at a certified local alignment shop immediately following your build.
Finally, keep in mind that newly installed metal suspension components will naturally shift and settle slightly during your first few drives. Drive the truck gently for roughly 100 miles around your neighborhood while listening closely for any unusual clunks, pops, or driveline vibrations. Once you hit the 100-mile milestone, pull back into your garage, slide underneath the frame with your torque wrench, and re-check every single fastener to guarantee total long-term safety.